
VOCs & Indoor Air Quality Austin TX | TemperaturePro

Good indoor air quality in Austin, TX homes depends on more than just a working HVAC system. One factor that often goes unnoticed is volatile organic compounds, or VOCs. These gases come from everyday household products and can build up indoors, especially in tightly sealed Austin homes where fresh air exchange is limited.

Woman relaxing on a couch enjoying her indoor air quality

If you’ve noticed a persistent chemical smell after painting or cleaning, or you’re just trying to be proactive about your family’s health, understanding VOCs is a good place to start. TemperaturePro West Austin offers indoor air quality services designed to help homeowners breathe easier without a lot of guesswork. 

What Are VOCs, and Where Do They Come From?


VOCs are chemicals that evaporate into the air at room temperature. They’re found in paints, varnishes, cleaning supplies, air fresheners, new furniture, carpet adhesives, and even some cosmetics. According to the
EPA, concentrations of many VOCs can be consistently higher indoors than outdoors, sometimes significantly so, because these products keep releasing compounds into the air long after use. In a warm climate like Austin, where homes are sealed up tight to keep conditioned air in, VOCs don’t have many ways to escape.

Your air conditioning system plays a role here too. A well-maintained air conditioning system helps circulate and filter air throughout your home, but standard filters aren’t designed to capture gaseous VOCs the way they trap dust or pollen. That’s part of why homeowners looking to improve air quality often need to think beyond filtration alone.

Signs of Bad Air Quality in Your Home


VOCs don’t always announce themselves clearly, but there are some common signs of bad air quality in your home worth paying attention to:

  • A lingering chemical or “new” smell that doesn’t fade after a few days
  • Headaches, dizziness, or irritation to your eyes, nose, or throat that improve when you leave the house
  • Visible condensation or musty odors, which can point to humidity imbalances
  • Dust buildup that seems to return quickly after cleaning
  • Family members or pets seeming more sensitive to allergies indoors than outdoors

If any of these sound familiar, it’s worth having your home’s air quality evaluated rather than guessing at the cause.

Practical Ways to Improve Indoor Air Quality at Home


There are steps homeowners can take on their own, and there are times when professional equipment makes a bigger difference. On the DIY side, choosing low-VOC paints and cleaning products, ventilating rooms while using strong chemicals, and keeping humidity levels balanced can all help reduce VOC buildup. Opening windows periodically, when Austin weather allows, also helps refresh indoor air.

For a more consistent solution, many Austin homeowners turn to an air scrubber for their home. An air scrubber installs directly into your existing ductwork and works continuously to reduce airborne contaminants, including some VOCs, without requiring you to remember to run a separate unit. It’s a practical option for households dealing with allergies, sensitivities, or simply wanting cleaner air as part of daily life.

FAQ


Do all VOCs smell bad?

No. Some VOCs have a noticeable odor, but others are odorless, which is part of why relying on smell alone isn’t a reliable way to judge air quality.

Can my air conditioner remove VOCs on its own?
Standard AC filters are built to catch particles like dust and pollen, not gaseous compounds. Additional equipment, like an air scrubber, is typically needed to address VOCs specifically.

How often should indoor air quality be checked?
Many homeowners have their air quality evaluated during routine HVAC maintenance, or sooner if they notice new symptoms or odors at home.

Ready for Better Air Quality? 


If you’re noticing signs of bad air quality in your home or want to talk through options like an air scrubber,
TemperaturePro West Austin can walk you through what makes sense for your household.

How to Lower Your Energy Bill This Austin Summer

If your electricity bill has doubled since June, you’re not imagining it. Austin summers put real strain on home cooling systems, and for most families, the AC becomes the single biggest line item on the utility bill. Learning how to lower energy bills with HVAC changes that actually work, not just tips that sound good on paper, can make a noticeable difference by August.

Woman fanning herself as her home's AC struggles to keep up with the summer heat
The good news is you don’t need to overhaul your whole system to see savings. A few adjustments to how you cool your home, paired with keeping your equipment in good shape, go a long way.

Why Is My Energy Bill So High in Summer?


It’s a fair question, especially when the bill jumps by hundreds of dollars in a single month. A few things are working against you at once. Austin regularly sees stretches of 100-degree days, which means your AC isn’t just turning on and off, it’s running for hours at a time trying to keep up. Older or poorly insulated homes lose that cool air almost as fast as the system produces it, especially around attics, windows, and door frames that weren’t built with today’s summer temperatures in mind.

There’s also the reality of how most people use their thermostats. Setting the AC to a very low temperature doesn’t cool your home faster, it just makes the system run longer than necessary once it gets there. And if your system hasn’t had a tune-up in a year or more, it may be working harder than it needs to just to hit the same temperature it used to reach easily. A dirty filter, low refrigerant, or a coil that needs cleaning can quietly increase your energy use without any obvious warning signs.

Austin Energy’s rate structure adds to this too. Electricity costs more per kilowatt-hour the more you use, so a system running inefficiently during peak summer months doesn’t just cost more in raw usage, it can push you into a higher pricing tier altogether.

Practical Ways to Lower Your Energy Bill This Summer


Some of these are things you can start today. Others are worth planning for before next summer rolls around.

  • Set your thermostat a few degrees higher when you’re away or asleep, rather than keeping it at one constant temperature all day
  • Close blinds or curtains on windows that get direct afternoon sun, especially on the west side of the house
  • Replace your air filter every one to three months so airflow isn’t restricted
  • Use ceiling fans to help circulate cool air, which lets you raise the thermostat a degree or two without losing comfort
  • Seal obvious gaps around doors and windows where cool air can escape
  • Avoid running the oven or dryer during the hottest part of the day, since both add heat and humidity your AC then has to work against

None of these require a big investment, but together they can meaningfully reduce how hard your system has to work.

Is a Smart Thermostat Worth It?


For a lot of Austin homeowners, yes. A smart thermostat learns your household’s schedule and adjusts automatically, so you’re not paying to cool an empty house during the workday or overcooling a home at 2 a.m. when everyone’s asleep under blankets anyway. The bigger benefit is consistency. Manual thermostats rely on someone remembering to adjust the temperature, and most families just don’t do that reliably.

Installation matters more than people expect. A smart thermostat installed without checking your system’s wiring and compatibility can cause more problems than it solves, from inaccurate readings to a unit that doesn’t communicate properly with your AC. If you’re considering the upgrade, it’s worth having someone check your current thermostat setup first so you know it’ll actually work with your home’s system.

Don’t Skip AC Maintenance


This is the one homeowners tend to overlook, mostly because the system still seems to be working fine. But a system that’s cooling your home is not the same as a system that’s cooling it efficiently. Regular
AC maintenance catches the small issues, like a dirty coil or low refrigerant, before they turn into higher bills or a breakdown in the middle of a heat wave.

FAQ


How much can a smart thermostat actually save me?

It varies by household, but most homeowners see a noticeable difference once the thermostat starts adjusting automatically instead of running on a fixed schedule.

Do I need maintenance every year if my AC seems fine?
Yes. Many efficiency issues don’t show up as obvious problems until the bill arrives or the system fails during peak summer heat.

What’s the fastest way to lower this month’s bill?
Start with the thermostat and airflow basics. A few consistent habit changes can show up on your next bill, while bigger fixes like maintenance or a smart thermostat pay off over the full summer.

Still Need Help? 


If your bill still feels too high after making these changes, it may be worth having a technician take a closer look. You can
schedule an appointment and get a straight answer about what’s actually driving your costs up.

Austin’s Seasonal HVAC Checklist & Energy Saving Tips

Smiling woman holding white gerbera daisy to her face.

If you’ve lived in Austin for a while, you know the weather keeps us on our toes. One week it’s chilly enough to turn on the heat, and the next you’re running the AC again. On top of that, spring allergies and summer triple-digit days can push your system to its limits.

The good news? A little seasonal HVAC maintenance goes a long way. This HVAC maintenance checklist is designed for central Texas homeowners to help you stay comfortable year-round, keep energy bills manageable, and avoid those last-minute breakdowns.

Spring: Get Ahead of Allergy Season

Springtime means bluebonnets in bloom, but it also brings cedar, oak, and plenty of pollen. Your HVAC system can help keep the worst of it outside — if it’s ready.

What to do this spring:

  • Change your air filter: During the heavy allergy season, swap it out monthly. A filter with a MERV rating of 8–13 is best for catching fine particles.
  • Book an AC tune-up: Getting ahead of the first 90-degree day saves stress later. Regular seasonal HVAC maintenance can improve HVAC energy efficiency by up to 15% (U.S. Department of Energy).
  • Set your thermostat: Aim for 76–78°F when you’re home. Bump it up a few degrees when you’re out to save energy.

Smart energy tip: Upgrading to a smart thermostat can cut cooling costs by about 10–12% each year (ENERGY STAR).

Summer: Beat the Texas Heat

There is hot, and then there’s Austin hot. If there was ever a time when your HVAC has to be on point, it’s during the Texas summer! With average highs in the mid-90s and plenty of 100°+ days, your AC needs all the help it can get.

Summer checklist:

  • Clear the airflow: Dust vents, vacuum registers, and make sure furniture isn’t blocking them.
  • Protect the outdoor unit: A little shade (without blocking airflow) helps it run more efficiently.
  • Adjust your thermostat: Set it around 78°F when home, and closer to 82–85°F when you’re away. Each degree above 72°F can save about 3% on cooling costs.

Smart energy tip: Ceiling fans don’t actually cool the air, but they can make it feel 4–6 degrees cooler. That means you can raise the thermostat without sacrificing comfort and enjoy extra energy savings.

Fall: Stay Flexible

Fall in Austin is a toss-up. Some years, you’ll run your AC in October. Others, you’ll need heat by November. This in-between season is the perfect time to prepare for both.

Fall checklist:

  • Change your filter (again): After a long summer of heavy AC use, it’s ready for a fresh start.
  • Check your heating system: A fall furnace or heat pump tune-up makes sure you’re not caught off guard during the first cold snap.
  • Seal the leaks: Caulking and weatherstripping can cut heating and cooling costs by up to 20% (ENERGY STAR).

Smart energy tip: When the weather is nice, open windows in the evening and let fresh air in — but only if outdoor air quality allows.

Winter May be Mild, But Don’t Skip It

Austin winters aren’t harsh, but sudden freezes happen, as we know, and that’s when HVAC systems tend to fail. A little attention in winter goes a long way.

Winter checklist:

  • Check thermostat settings: Keep it around 68–70°F when home. Lower it slightly while you sleep or when you’re out.
  • Flip your ceiling fans: Switch them clockwise at low speed to gently push warm air down.
  • Test carbon monoxide detectors: Especially if you use gas heat, this step is critical for safety.

Smart energy tip: Lowering your thermostat by 7–10°F for 8 hours a day can save about 10% on heating costs each year (U.S. Department of Energy).

Habits That Work Year-Round

Some things never change — and they’ll keep your system in better shape all year long.

  • Replace filters regularly (every 1–3 months, monthly during heavy use).
  • Keep your outdoor unit clear of leaves, grass, and debris.
  • Schedule professional seasonal HVAC maintenance twice a year: once in spring for cooling, once in fall for heating.

Staying Comfortable in Austin

Austin weather may keep you guessing, but your HVAC system doesn’t have to. With the right HVAC maintenance checklist, you’ll be ready for allergies, triple-digit summers, unpredictable fall days, and the occasional winter freeze.

And if you’d rather not worry about the details, that’s what we’re here for. At TemperaturePro Austin, our NATE-certified technicians help homeowners across Travis and Hays counties with tune-ups, repairs, and honest guidance — always with upfront pricing and no surprises.

Ready to schedule your seasonal HVAC maintenance? Give us a call and we’ll make sure your home is comfortable, efficient, and prepared for every season!

Austin HVAC Myths Debunked: Separating Fact from Fiction for Homeowners

From 100+ degree days to the occasional winter freeze, Austin homeowners rely on their HVAC systems year-round. Any local resident knows the value of a well-functioning HVAC Austin system. But when it comes to heating and cooling your home efficiently, there’s a lot of misinformation out there. Falling for common myths can lead to higher energy bills, unnecessary repairs, and reduced comfort.

We’re here to set the record straight. Let’s break down some of the most common HVAC myths and share what you really need to know to keep your system running strong.

Woman in West Austin home adjusting thermostat to save energy in the summer.

Myth #1: A Bigger HVAC System Will Cool or Heat Your Home Faster


Why It’s a Common Belief:

It seems logical, right? A bigger unit seems like it would cool things down more quickly.

The Fact:
An oversized system can actually work against you. Bigger units often short cycle, which means that they turn on and off frequently. This can be especially problematic in Austin’s humid climate, where proper dehumidification is key to comfort. You may feel cool but clammy, and your system will wear out faster due to the extra strain.

The Fix:
The right-sized HVAC system is based on a professional load calculation that takes into account your home’s square footage, insulation, window placement, and sun exposure. Our certified technicians at TemperaturePro Austin can help you choose the system that fits your home, whatever size that may be.  

Myth #2: Closing Vents in Unused Rooms Saves Energy


Why Homeowners Do This:

It seems like an easy way to redirect airflow and save money, and if they say it works, it must, right?

Why It Doesn’t Work:
Closing vents disrupts the airflow balance your HVAC system was designed for. This increases pressure in your ductwork, which can stress components like the blower motor, reduce efficiency, and even cause duct leaks. Over time, it can lead to system damage and even higher repair costs.

What to Do Instead:
Keep vents open throughout your home to maintain balanced airflow. If you want better temperature control from room to room, consider upgrading to a zoned HVAC system or installing a smart thermostat.

Myth #3: Lowering the Thermostat All the Way Down Cools Your Home Faster


Why It Feels Like It Should Work:

Many people walk into a hot house and think, “If I set the thermostat to 65°F, it’ll cool faster.”

Reality Check:
Your system cools at a consistent rate — no matter how low you set the temperature. Lowering the thermostat simply causes your unit to run longer, which isn’t great for energy efficiency and increases wear on your system without speeding up the cooling process.

Pro Tip:
Stick with a comfortable, steady temperature (around 74–76°F for most Austin homes), and use a programmable or smart thermostat to make adjustments while you’re away or asleep.

Myth #4: HVAC Maintenance Isn’t Necessary Unless Something Breaks


Why Some Skip It:

If your system seems to be working fine, regular HVAC maintenance can feel like an unnecessary expense. “If it ain’t broken, why fix it?”

Why That’s Risky:
Neglecting routine service can lead to hidden issues that reduce efficiency and lead to breakdowns — especially during peak the very hot days or cold, cold months. Dirty coils, low refrigerant, and worn parts are easy to catch early, but expensive if ignored.

Why It Matters:
Professional HVAC tune-ups twice a year (spring and fall) help extend your system’s lifespan, improve energy efficiency, and keep your warranty intact. Our maintenance plans at TemperaturePro Austin make it easy to stay on schedule and save money long-term.

Trust the Pros. Stay Comfortable Year-Round.


At TemperaturePro Austin, our mission is simple: keep your home comfortable and energy-efficient through every season. If you have questions about your HVAC system or want to schedule a tune-up, we’re just a call or click away.

Eliminating AC Odors: A Guide for Austin Homeowners

There’s nothing quite like a scorching Austin summer day. When you finally step indoors, you crave that blast of cool, refreshing air from your air conditioner. But what if, instead of relief from the heat, you’re hit with an unpleasant odor? It’s a common complaint we hear at Temperature Pro Austin, and trust us, you’re not alone in experiencing that unwelcome bad AC smell. It’s not just an annoyance; it can be a significant indicator of underlying issues with your system.

So, why does your air conditioner smell bad, and more importantly, how can you make that awful AC smell disappear? Let’s dive in!

Dirty air conditioner filter on the left and clean new filter on the right.

Understanding the Culprit: Why Your AC Smells Bad

Before you can tackle the problem, it helps to understand what might be causing that unwelcome aroma. The most common culprit behind a smelly air conditioner is moisture combined with organic growth. Your AC works by removing heat and humidity from the air. This process creates condensation, which usually drains away. However, if this drainage is impeded or if moisture collects in certain areas, it creates a perfect breeding ground for mold, mildew, and bacteria.

Beyond mold, other reasons for a bad AC smell can include:

  • Dirty Evaporator Coils: Cold coils absorb heat. Dust, dirt, and pet dander accumulate, trapping moisture and causing mold/mildew.
  • Clogged Condensate Drain Line: Clogged drain lines cause stagnant water in the condensate pan, leading to microbial growth and a “dirty sock syndrome” smell.
  • Dirty Air Filter: Neglected air filters can spread mold and odors, hurting air quality.
  • Ductwork Issues: Leaky or uninsulated ducts, especially in damp areas like attics or crawl spaces, can become a breeding ground for mold and can draw in unwanted odors from those areas.
  • Refrigerant Leaks: While less common for a “smell,” a refrigerant leak can sometimes produce a sweet, chloroform-like odor.

Mini-split air conditioner dripping condensation.

DIY Steps to Tackle that AC Odor

While some issues definitely require a professional, there are a few things you, as a homeowner in Austin, can do to try and get rid of AC smell before calling in the cavalry.

First, change your air filter regularly. This is the easiest and often most effective first step. A clean filter improves air quality and prevents many odor issues. Aim to change it every 1-3 months, more often if you have pets or allergies. Next, inspect and clean around your outdoor unit. Make sure there’s no debris, leaves, or overgrown plants around your outdoor condenser unit. Good airflow helps prevent moisture buildup. These options should alleviate the smell you are facing, but in some instances, professional help is key to solving your problem. 

When DIY Isn’t Enough: Professional AC Odor Removal

Sometimes, despite your best efforts, that AC odor removal seems impossible. This is where the experienced technicians here at Temperature Pro Austin come in. We have specialized tools and knowledge to diagnose and fix more persistent or complex odor issues.

We provide services to help remove bad smells from your AC. 

  • Deep Coil Cleaning: We use professional-grade cleaners and techniques to thoroughly clean your evaporator and condenser coils, eliminating stubborn mold and grime that household products can’t touch.
  • Thorough Drain Line Clearing and Sanitization: We can clear severe clogs in your condensate drain line and sanitize the pan to prevent future microbial growth.
  • Ductwork Inspection and Cleaning: If the smell is coming from your vents, we can inspect your ductwork for mold, leaks, or animal intrusions and recommend professional duct cleaning or sealing.
  • UV Light Installation: For recurring mold issues, especially around the evaporator coil, we can install a UV light system within your air handler. This light kills mold and bacteria as air passes through, offering a long-term solution to that musty AC smell.

Prevention is Key: Keeping Your Air Fresh

Once you’ve successfully banished that bad AC smell, you’ll want to keep it from coming back. Regular maintenance is your best defense.

The most important step is to schedule annual AC tune-ups. A professional tune-up allows us to catch potential issues like drain clogs, dirty coils, or refrigerant leaks before they become major problems – and before they start smelling! We’ll clean components, check refrigerant levels, and ensure your system is running efficiently.

Also, maintain good indoor air quality. Use high-quality air filters, and consider an air purifier if you have pets or allergies. Proper ventilation can also help. Lastly, if your home is excessively humid, your AC has to work harder; address humidity issues by considering a whole-home dehumidifier if necessary.

Call the Professionals at TemperaturePro Austin Today!

Don’t let a stinky air conditioner smell ruin your Austin summer. While some minor odors can be addressed with simple DIY steps, persistent or severe smells often point to deeper issues that require expert attention. Whether you’re dealing with a musty AC smell, a moldy AC smell, or any other unwelcome aroma, getting to the root of the problem is crucial for both your comfort and your system’s health.

For reliable AC odor removal and comprehensive AC cleaning, trust the local experts who understand Austin’s unique climate challenges. Our trained technicians have the tools and experience to properly diagnose the source of your bad AC smell and implement lasting solutions. Don’t suffer through another smelly day – call your local Temperature Pro Austin team today

Is Your AC Blowing Hot Air? A Guide on How to Reset AC Compressor

Here in Austin, a fully functioning air conditioner isn’t a luxury—it’s a necessity. When your AC unit suddenly starts blowing warm air on a sweltering Texas afternoon, it can be frustrating. Before you panic, this simple guide on how to reset your AC compressor may be the quick fix you need.

The compressor is the heart of your air conditioning system, responsible for circulating refrigerant to cool your home. Sometimes, for safety reasons, it can trip or shut off. Here at TemperaturePro Austin, we believe in empowering homeowners with the knowledge they need to keep their home comfortable amidst the Texas heat. Let’s walk through the reasons your compressor might trip and the proper steps for a safe reset.

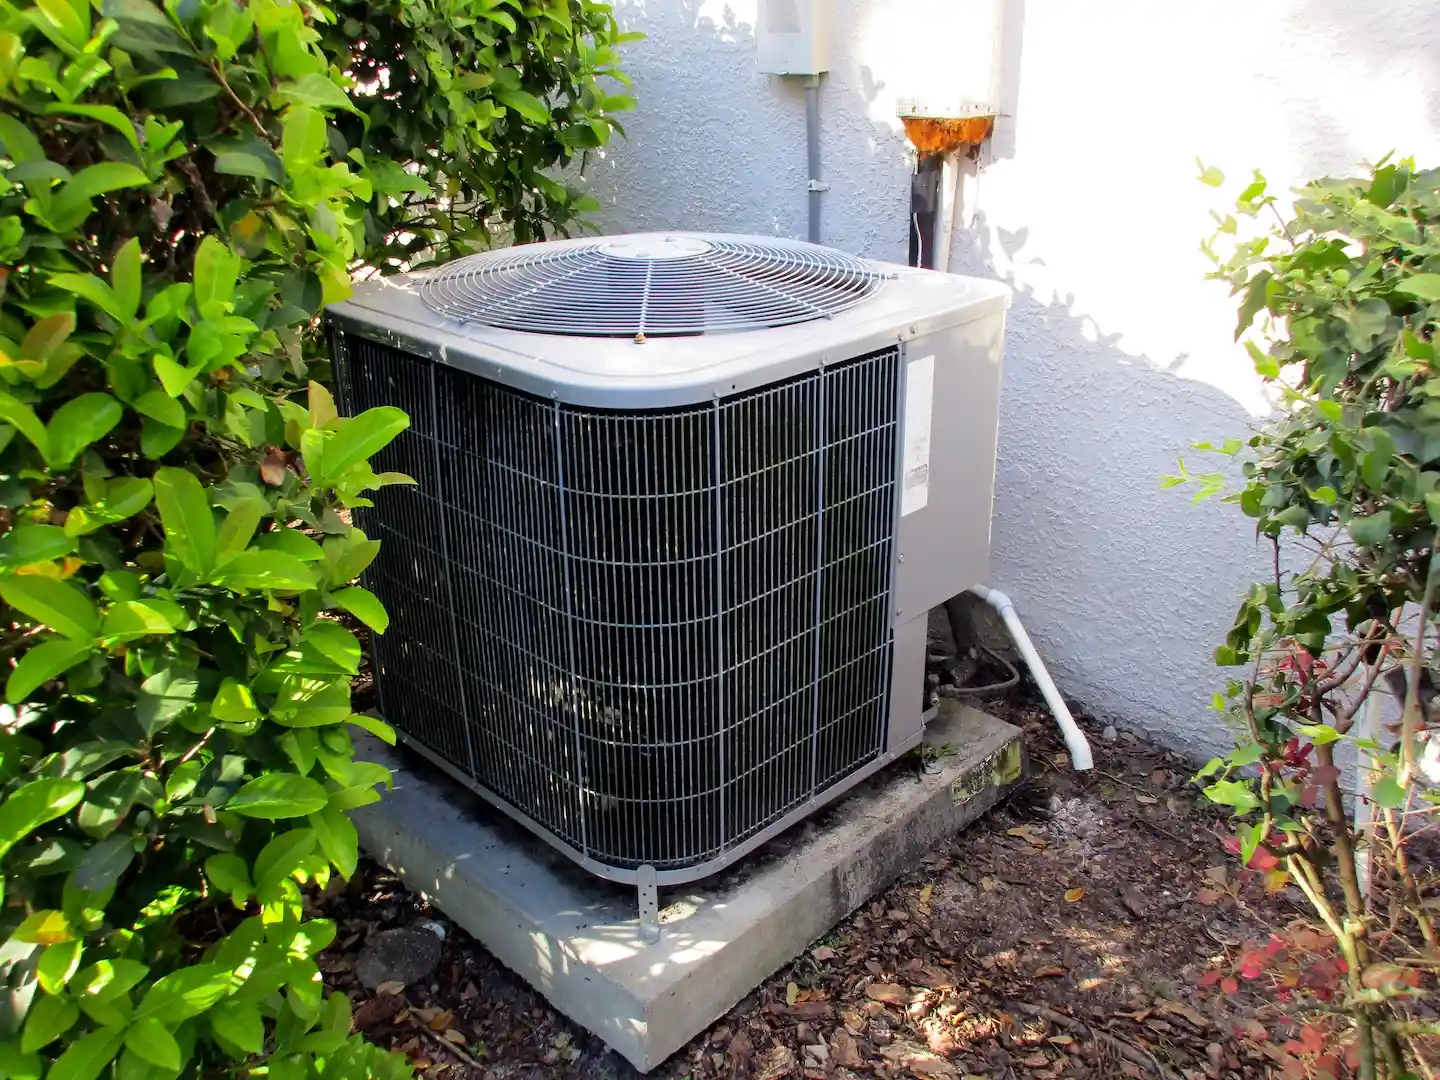
Outdoor air conditioning unit in Austin with AC compressor that needs to be reset.

Why Does an AC Compressor Need to Be Reset?

Think of the reset button as a safety switch. Your AC unit’s internal diagnostics will shut down the compressor to prevent serious damage if it detects a problem. Common causes include:

  • Power Surges: A brief power outage or a surge from a nearby lightning strike can trip the system.
  • Overheating: On the hottest Austin days, your AC works overtime. A dirty air filter, blocked condenser coils, or low refrigerant can cause the unit to overheat and shut down.
  • Refrigerant Issues: If refrigerant levels are too high or too low, the pressure inside the system can become unsafe, triggering a shutdown.
  • Debris and Blockages: Your outdoor unit needs to breathe. Dirt, leaves, and other debris can clog the coils, leading to overheating.

How to Reset AC Compressor: A Step-by-Step Guide

If you feel comfortable with basic troubleshooting, follow these steps carefully. Safety is the number one priority.

  • Step 1: Turn Off Your Thermostat: Set your home’s thermostat to the “Off” position to stop it from signaling the AC unit.
  • Step 2: Shut Off the Breaker: Find the AC’s circuit breaker in your main electrical panel and switch it completely off.
  • Step 3: Turn Off the Outdoor Shut-Off: For added safety, find the exterior shut-off box near the outdoor unit and turn its power switch off.
  • Step 4: Wait for 30 Minutes: Allow the unit’s internal protector to cool down and reset; do not skip this waiting period.
  • Step 5: Press the Reset Button: Locate the small, often red, reset button on the compressor unit and press it firmly once.
  • Step 6: Restore Power: Turn the power back on, first at the outdoor shut-off box and then at the main circuit breaker.
  • Step 7: Turn the Thermostat On: Set your thermostat back to “Cool” and listen for the compressor to kick on within a few minutes.

When to Call the Pros at TemperaturePro Austin

Knowing how to reset AC compressor is a valuable skill, but if you have to do it more than once, it’s time to call a professional. A recurring trip often points to an underlying issue that needs an expert diagnosis.

Contact TemperaturePro Austin if:

  • The compressor trips again shortly after you reset it.
  • You can’t find the reset button or are uncomfortable performing these steps.
  • The AC unit makes unusual noises (grinding, buzzing, or clanking) after you restore power.
  • The system still blows warm air after a successful reset.

Continuously resetting your AC without addressing the root cause can lead to catastrophic compressor failure—a much more expensive repair. The certified technicians at TemperaturePro Austin have the tools and expertise to diagnose the real problem, whether it’s a refrigerant leak, a faulty capacitor, or an electrical issue.

Stay cool and safe! For reliable AC repair and maintenance in the Austin area, trust the experts and schedule an appointment with us at TemperaturePro.

AC Unit Not Turning On in West Austin? Here’s What to Check First (and When to Call the Pros!)

Summer in West Austin is no time for a malfunctioning air conditioner. Few things are more uncomfortable than walking into a warm home only to find your AC unit not turning on. When your home’s cool comfort suddenly disappears, it’s natural to feel frustrated and wonder what to do next.

Before you panic, there are several common issues and quick checks you can perform when your AC isn’t cooperating. Understanding these steps can sometimes resolve the problem, or at least help you explain the symptoms clearly to a professional.

Why Your Outside AC Unit Might Not Be Turning On

One of the most common complaints we hear is the outside AC unit not turning on, even when you hear the indoor fan running. This scenario, where the outside AC unit is not turning on but inside is, often points to an issue with the outdoor unit itself – specifically, the AC condenser unit not turning on. If you notice the fan not turning on the AC unit, while your indoor system seems to be active, it’s a strong indicator of a problem with the outdoor condenser or its components.

Your First Steps: Simple Checks and How to Reset Your AC Unit

When your AC stops working, the very first thing to check when the AC stops working is often the simplest:

Thermostat Settings 

Ensure your thermostat is set to “Cool” and the temperature is set lower than the current room temperature. Check that batteries aren’t dead if it’s a battery-powered model. Check out our recent blog on recommended thermostat settings for Summer and Winter to learn more about what temperature to set your thermostat to to ensure a healthy AC during the summer heat.

Circuit Breaker

Sometimes, a surge or minor electrical issue can trip the breaker. Go to your home’s electrical panel and look for a tripped breaker labeled “AC,” “Furnace,” or “HVAC.” It will be in the “off” or middle position. Firmly flip it completely to the “off” position, wait 30 seconds, and then flip it back to “on.” This is essentially how to reset your air conditioning unit from an electrical standpoint.

Diving Deeper: Fuses and Capacitors

If a breaker reset doesn’t work, the problem might be with specific components in your outdoor unit:

Fuses

Your outdoor AC unit often has a disconnect box near it with fuses. How to tell if an AC fuse is blown usually involves visual inspection (broken filament, discoloration) or using a multimeter (which requires electrical knowledge). Will AC turn on if the fuse is blown? No, if a critical fuse is blown, the unit will not receive power and therefore will not turn on. How do I reset my AC fuse? You don’t reset them; you replace them. This should only be done by a qualified technician due to electrical hazards.

Capacitor

The capacitor acts like a battery, providing a jolt of electricity to start the compressor and fan motor. How to tell if an AC capacitor is bad often involves a visual inspection for swelling or leakage (though this isn’t always visible), or testing with a multimeter. A common symptom of a failing capacitor is the outdoor unit making a humming noise but the fan not spinning, or the unit repeatedly trying to start and failing. Replacing a capacitor is a task for a professional due to the high voltage it can hold, even when the power is off.

When to Call Temperature-Pro West Austin

While some checks are DIY-friendly, troubleshooting electrical components like fuses and capacitors can be dangerous and should be left to certified professionals. If your AC unit is still not turning on after checking the thermostat and circuit breaker, it’s time to call in the experts.

At Temperature-Pro West Austin, we specialize in diagnosing and repairing all types of AC issues, big or small. Our experienced technicians understand the unique demands of West Austin’s climate and are equipped to quickly identify the root cause of your AC problem, from blown fuses to bad capacitors and beyond. Don’t sweat it out – contact us for reliable, efficient AC repair and get your cool comfort back!

Mini-Split vs. Central Air: The Ultimate Guide to Choosing Your Home’s Perfect Cooling System

Choosing a new air conditioning system is a significant decision for any homeowner. You want comfort, efficiency, and a solution that fits your specific needs and budget. Two popular contenders often come up: the versatile mini-split system and the traditional central air conditioning unit. While both aim to cool your home, they operate differently and offer distinct advantages and disadvantages. Understanding these differences is key to making an informed choice that will keep you cool and comfortable for years to come. This guide will break down the matchup between mini-split vs central air, helping you determine the ideal cooling solution for your living space.

Understanding the Core Differences: How They Work

Before diving into the pros and cons, it’s essential to understand the fundamental operational differences between mini split vs central air.

Central Air Conditioning

This is the system most people are familiar with. A central air conditioner typically uses a large outdoor unit (condenser) connected to an indoor unit (air handler, often part of your furnace). The air handler distributes cooled air throughout the entire house via a network of ducts and vents. A single thermostat, or sometimes a zoned system with multiple thermostats, controls the temperature for the whole home or specific large areas. The air is cooled at a central point and then pushed through the ductwork to each room. This system is designed for whole-house cooling and often integrates with your heating system.

Mini-Split Air Systems 

Mini-split, also known as ductless or ductless mini-split systems, offer a more decentralized approach to cooling (and often heating). Like central air, they have an outdoor compressor/condenser unit, but instead of one large indoor air handler, they connect to one or more compact indoor air handling units. These indoor units are typically wall-mounted, ceiling-recessed, or even floor-standing, and each one cools a specific room or “zone.” A thin conduit containing the refrigerant lines, power cable, and condensate drain connects the outdoor unit to the indoor units, requiring only a small three-inch hole through the wall. Each indoor unit has its own thermostat, allowing for independent temperature control in different zones.

Installation: Effort, Invasiveness, and Initial Setup

The installation process and requirements vary significantly between central air and mini-split systems, impacting both cost and convenience.

Central Air Installation

If your home already has existing ductwork in good condition, replacing an old central air unit with a new one can be relatively straightforward. However, if your home lacks ductwork (common in older homes or those with non-forced air heating like radiators or baseboards), installing a new central air system becomes a major undertaking. This involves fitting extensive ductwork throughout your walls, ceilings, or attic, which can be invasive, time-consuming, and significantly more expensive. Even with existing ductwork, ensuring it’s properly sized, sealed, and clean is crucial for efficient operation, potentially adding to the initial workload.

Mini-Split Installation

Mini-split systems shine when it comes to installation flexibility and ease, particularly in homes without existing ductwork. The lack of extensive ductwork means installation is far less invasive. The primary requirement is mounting the indoor units and connecting them to the outdoor unit via the small conduit. This makes them an excellent choice for additions, retrofitting older homes, or targeting specific areas that are difficult to cool. A single-zone (one indoor unit) mini-split can often be installed in a day, while multi-zone systems (multiple indoor units connected to one outdoor unit) will take longer but are still generally quicker and less disruptive than installing a full central air system with new ductwork.

Efficiency and Zoning: Tailoring Your Comfort and Energy Bills

Energy efficiency and the ability to control temperatures in different areas are critical factors that directly impact your comfort and long-term operating costs.

Central Air Efficiency and Zoning

Modern central air conditioners have become significantly more energy-efficient, with SEER (Seasonal Energy Efficiency Ratio) ratings commonly ranging from 14 to 22+. However, a significant potential for energy loss in central air systems comes from the ductwork. Leaky, poorly insulated, or improperly sized ducts can account for up to 30% of energy consumption for space conditioning. While central air systems can be equipped with zoning capabilities (using dampers in the ductwork and multiple thermostats to control different areas of the house), these systems can add considerable expense and complexity. Without zoning, you’re cooling the entire house to the same temperature, even rooms you’re not using, which can lead to wasted energy.

Mini-Split Efficiency and Zoning

A mini-split is generally highly energy-efficient. Because the cooled air is delivered directly into the room from the indoor unit, there are no energy losses associated with ductwork. Many mini-split models boast very high SEER ratings, some exceeding 30. Furthermore, the inherent design of mini-split systems facilitates zoning. Each indoor unit operates independently, allowing you to cool only the occupied rooms and set different temperatures based on individual preferences. This targeted cooling can lead to substantial energy savings compared to cooling an entire home with a central system, especially if only certain areas are regularly used. Many mini-splits also feature inverter technology, which allows the compressor to adjust its speed based on demand, further enhancing efficiency and providing more consistent temperatures.

Cost Considerations: Upfront Investment vs. Long-Term Savings

The financial aspect is a crucial part of the decision-making process, encompassing both the initial purchase and installation costs, as well as ongoing operational and maintenance expenses.

Central Air Costs

The upfront cost of installing central air can vary widely. If replacing an existing unit and using current ductwork, the cost can be moderate. However, if new ductwork installation is required, the initial investment can be significantly higher, potentially ranging from $5,000 to $12,000 or more, depending on the home’s size and complexity. Annual maintenance, including professional check-ups and filter replacements, is essential. Duct cleaning, recommended every 3-5 years, adds another recurring expense. While newer central units are more efficient, energy bills can still be substantial, especially for larger homes or in hotter climates, particularly if the ductwork isn’t optimal.

Mini-Split Costs

The initial cost of a mini-split system depends on the number of zones (indoor units) needed. A single-zone system might cost less than a new central air installation (especially if ductwork is needed for the central system), typically ranging from $2,000 to $6,000 for one zone. However, for a multi-zone system to cool an entire house, the upfront cost can be comparable to or even exceed that of a central air system, potentially reaching $10,000-$15,000 or more. Maintenance involves regularly cleaning the filters on the indoor units (often monthly) and ensuring the outdoor unit is clear of debris. Professional servicing is also recommended annually. The significant advantage lies in lower operating costs due to higher efficiency and zoned cooling, potentially leading to substantial long-term savings on energy bills.

Pros and Cons at a Glance: Making the Final Call

To help summarize, here’s a quick rundown of the primary advantages and disadvantages of each system:

Central Air Conditioning Systems

Pros:

  • Invisible Operation: Ductwork and air handlers are hidden, with only subtle vents visible, maintaining room aesthetics.
  • Whole-House Uniformity: Provides consistent cooling throughout the entire home from a single system.
  • Often Lower Upfront Cost (with existing ductwork): If suitable ductwork is already in place, replacing or installing a central unit can be more cost-effective initially.
  • Air Filtration for the Whole Home: Central systems can incorporate advanced air filters, improving air quality throughout the house.
  • Good for Large Homes: Efficiently cools larger, open-plan homes where individual zoning is less critical.

Cons:

  • Requires Ductwork: Installation is invasive and expensive if ductwork isn’t present or needs significant repairs.
  • Energy Loss Through Ducts: Leaky or poorly insulated ducts can lead to significant energy inefficiency.
  • Less Flexible Zoning: Standard systems cool the entire house; adding sophisticated zoning increases cost and complexity.
  • Can Be Noisy: The outdoor unit and sometimes the air handler can generate noticeable noise.
  • One Thermostat for All: Less individual comfort control for different rooms or occupants without investing in a zoning system.

Mini-Split Air Systems (Ductless)

Pros:

  • No Ductwork Needed: Ideal for homes without existing ducts, additions, or specific problem areas. Installation is less invasive.
  • High Energy Efficiency: Direct air delivery means no duct losses, and many units have very high SEER ratings. Inverter technology further optimizes energy use.
  • Flexible Zoning and Individual Control: Each indoor unit has its own thermostat, allowing for personalized comfort and energy savings by cooling only occupied zones.
  • Quiet Operation: Indoor units are typically very quiet, and outdoor units are often quieter than traditional central AC condensers.
  • Can Provide Heating: Many mini-split models are heat pumps, offering both cooling and efficient heating.

Cons:

  • Visible Indoor Units: Wall-mounted, ceiling, or floor units are visible in the room, which may not appeal to all homeowners.
  • Higher Upfront Cost for Whole-Home Coverage: Equipping an entire house with multiple indoor units can be more expensive initially than a basic central air system (if ductwork exists).
  • Regular Filter Maintenance per Unit: Each indoor unit has a filter that needs regular cleaning (often monthly).
  • Distribution in Larger, Complex Rooms: A single indoor unit might struggle to evenly cool very large or irregularly shaped rooms without careful placement or multiple units in that space.
  • May Require Multiple Outdoor Units: Very large homes or specific configurations might require more than one outdoor condenser.

Ultimately, the choice between mini-split and central air conditioning depends on your specific circumstances. Feeling unsure about the best fit for your home?

Contact us today! Our team of HVAC professionals is here to provide expert, tailored advice and help you select the perfect air conditioning system that will best serve your needs and keep you comfortable all year round!

Decoding SEER Ratings: Your Guide to HVAC Efficiency in Austin

Ever feel lost in the alphabet soup of HVAC terminology? Don’t worry, we’re here to break it down! Today, we’re tackling SEER ratings in HVAC—a crucial factor in understanding the energy efficiency of your air conditioner or heat pump. At TemperaturePro Austin, we believe in empowering homeowners with knowledge, so let’s dive in!

Lightbulb surrounded by energy-efficiency icons.

What Does SEER Mean in HVAC?

SEER stands for Seasonal Energy Efficiency Ratio. In simple terms, it’s a measure of how efficiently your cooling system uses energy to keep your home comfortable during those hot Texas summers.

Think of it like your car’s fuel efficiency or miles per gallon (MPG). A higher MPG means you can travel further on a gallon of gas. Similarly, a higher SEER rating means your AC uses less energy to provide the same amount of cooling, leading to lower energy bills.

How is SEER calculated? It’s the ratio of the cooling output (measured in BTUs or British Thermal Units) to the energy input (measured in watt-hours). So, a higher BTU output with lower energy consumption results in a higher SEER rating.

HVAC SEER Ratings: What’s a Good Number?

SEER ratings for residential air conditioners typically range from 13 to 25 or higher. But what’s considered a “good” SEER rating for your Austin home?

The Department of Energy (DOE) sets minimum SEER standards for different regions. In the South, including Austin, the minimum requirement for new AC units is 14 SEER or 14.3 SEER2.

Choosing the right SEER rating depends on your budget and long-term energy savings goals. While higher SEER units generally cost more upfront, they can significantly reduce your energy bills over time (and they’re better for the environment).

SEER2 vs SEER in HVAC

This chart provides a quick and easy comparison of the key differences between SEER and SEER2, helping homeowners understand the recent changes in HVAC efficiency ratings.

Feature SEER SEER2
Testing Procedure Older testing standards Updated testing standards (as of January 1, 2023)
Accuracy Less accurate reflection of real-world performance More accurate reflection of real-world performance
Testing Conditions Less stringent (lower external static pressure) More stringent (higher external static pressure)
Numerical Values Generally higher Generally lower
Efficiency Lower Higher (despite lower numerical values)
Applicability Applied to systems manufactured before January 1, 2023 Applied to systems manufactured after January 1, 2023


Key takeaway: Although SEER2 ratings are numerically lower than SEER ratings, they actually represent higher efficiency levels due to the updated and more stringent testing procedures.

Example: A 14 SEER2 unit is more efficient than a 14 SEER unit.

Here’s a more specific estimate of SEER2 vs SEER ratings in HVAC:

SEER  Approximate SEER2 Equivalent
14  14.3
16  15.5
18  16.8
20  18.0
22  19.3


Important Notes:

  • These are approximate equivalents and may not be perfectly accurate for all systems.
  • The actual SEER2 rating for a specific unit will depend on its design and the specific testing conditions.
  • This chart is meant to provide a general idea of how SEER and SEER2 values relate to each other.

Benefits of High SEER Ratings: More Than Just Savings

Investing in a high-SEER HVAC system offers several benefits:

  • Lower Energy Bills: Reduced energy consumption translates to direct savings on your monthly utility costs.
  • Environmental Friendliness: Energy-efficient systems use less electricity, reducing your carbon footprint and contributing to a healthier planet.
  • Enhanced Comfort: High-SEER systems often provide better humidity control and more consistent temperatures throughout your home. We all know how important that is during Texas summers!

Factors Affecting SEER Performance

While SEER ratings provide a valuable benchmark, remember that real-world efficiency can be influenced by other factors:

  • Proper Installation: A qualified HVAC technician must install your system correctly to ensure it achieves its rated efficiency.
  • Regular Maintenance: Keep your system running smoothly with regular maintenance, including cleaning, filter changes, and tune-ups.
  • Home Insulation and Ductwork: A well-insulated home and efficient ductwork help maximize the benefits of a high-SEER system.

Making Smart SEER HVAC Choices

Understanding SEER ratings empowers you to make informed decisions about your HVAC system. By considering SEER alongside your budget and comfort needs, you can choose a system that delivers optimal efficiency and long-term savings.

Need help navigating the world of SEER ratings and finding the perfect HVAC system for your Austin home? Read out types of AC units guide or contact TemperaturePro Austin today for a free consultation! 

We’re here to guide you every step of the way, ensuring you get the best solution for your needs.

Steps to Unclog an AC Drain Line

A clogged AC drain line can lead to a host of problems, from water damage to mold growth. Fortunately, it’s often a DIY fix that can save you time and money. In this guide, we’ll walk you through the steps on how to unclog your AC drain line safely and effectively.

Understanding the AC Drain Line

Before diving into the unclogging process, let’s understand the role of the AC drain line. Your air conditioner works by removing moisture from the air, and this moisture collects in a drain pan. The drain line then carries this water away from your unit and safely outdoors.

However, over time, dirt, dust, algae, and even mold can accumulate in the drain line, causing a clog. Signs of a clogged drain line include:

  • Water leaking around your indoor unit
  • Musty odors
  • Increased humidity levels
  • AC unit turning off unexpectedly

Tools You’ll Need

Before you begin, gather the following tools:

  • Wet/dry vacuum
  • Screwdriver
  • Distilled white vinegar
  • Measuring cup
  • Funnel
  • Protective gloves
  • Safety glasses

Step-by-Step Guide to Unclog Your AC Drain Line

  1. Turn off the power: Locate the breaker or switch that controls your AC unit and turn it off. This is crucial for your safety.
  2. Locate the drain line: The drain line is typically a PVC pipe that exits your home near the outdoor condenser unit. It might also be accessible from the indoor air handler.
  3. Disconnect the drain line: If possible, disconnect the drain line from the unit. This will allow for better access and cleaning.
  4. Vacuum the drain line: Attach the wet/dry vacuum hose to the drain line opening and try to suck out any debris or standing water.
  5. Pour vinegar solution: Mix a solution of equal parts distilled white vinegar and water. Using a funnel, carefully pour about a cup of this solution into the drain line.
  6. Wait: Let the vinegar solution sit in the drain line for about 30 minutes. The vinegar will help break down any organic matter causing the clog.
  7. Flush with water: After 30 minutes, pour a cup of clean water into the drain line to flush out the vinegar and any loosened debris.
  8. Reconnect and test: Reconnect the drain line to the unit and turn the power back on. Run the AC for a while and check for any leaks or signs of a clog.

Two Air Conditioning Units next to each other, outside near plants in a yard.

Additional Tips

  • If the clog persists, you may need to repeat the vinegar flush or try a commercial drain cleaner specifically designed for AC drain lines.
  • For stubborn clogs, consider using a plumbing snake or calling a professional like TemperaturePro Austin.
  • To prevent future clogs, pour a cup of distilled white vinegar down the drain line every few months.
  • Regularly change your air filter to reduce the amount of dust and debris that can enter your system.

When to Call a Professional

While unclogging an AC drain line is often a DIY task, there are instances where it’s best to call a professional:

  • If you’re uncomfortable working with your AC unit or plumbing
  • If you’ve tried the above steps and the clog persists
  • If you suspect a more serious issue with your AC system

TemperaturePro Austin: Your HVAC Partner

At TemperaturePro Austin, we understand the importance of a properly functioning AC system. If you’re experiencing any issues with your AC, including a clogged drain line, don’t hesitate to contact us. Our team of experienced technicians is ready to provide prompt and reliable service to keep your home cool and comfortable.

Remember, regular maintenance is key to preventing AC problems. You can schedule an annual tune-up with TemperaturePro Austin to ensure your system is running efficiently and to catch any potential issues before they become major problems.

We hope this guide has been helpful in showing you how to unclog your AC drain line. If you have any further questions or concerns, feel free to reach out to us. We’re always here to help!